 Pin It
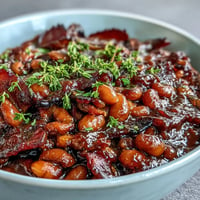
 The smell of pinto beans simmering on the back burner takes me straight to my grandmother's cramped kitchen, where she'd keep a pot going for days. She never measured anything, just dumped in a handful of this and a splash of that, but somehow her beans always turned out impossibly creamy and rich. I spent years trying to replicate that magic, watching foam rise to the surface, adjusting the heat, learning that patience is the one ingredient you can't buy at the store. Now it's become my own weekend ritual, the kind of cooking that makes the whole house feel warmer.
Last winter, during that endless stretch of gray weekends, I started making a batch every Sunday. My teenage son, who'd previously declared beans as "boring health food," started wandering into the kitchen, asking what smelled so good. Now he requests these specifically for taco night, piling his tortillas high with beans that actually taste like something. It's funny how the most humble ingredients can become the ones everyone remembers.
Ingredients
- 1 pound dried pinto beans: Sorting through them for small stones or shriveled beans takes two minutes but saves you from an unpleasant surprise later
- ½ medium yellow onion: Finely dicing releases more flavor, and the onion essentially dissolves into the bean liquid
- 2 teaspoons garlic: Fresh garlic makes all the difference here—jarred stuff can turn bitter during long simmering
- 2 bay leaves: An old trick that adds a subtle earthy backbone, though you won't taste them directly
- ⅓ cup extra-virgin olive oil: This much fat might seem excessive, but it's what creates that luxurious mouthfeel
- 4 cups cold water: The ratio matters—too much water dilutes the flavor, too little leaves you with starchy sludge
- 1 tablespoon kosher salt: Adding salt at the end prevents tough skins, but don't skip it or the beans will taste flat
Tired of Takeout? 🥡
Get 10 meals you can make faster than delivery arrives. Seriously.
One email. No spam. Unsubscribe anytime.
Instructions
- Soak the beans:
- Spread them in a large bowl and cover with several inches of cold water, letting them plump up for at least 8 hours or overnight—the skins will wrinkle slightly, which is exactly what you want.
- Start the pot:
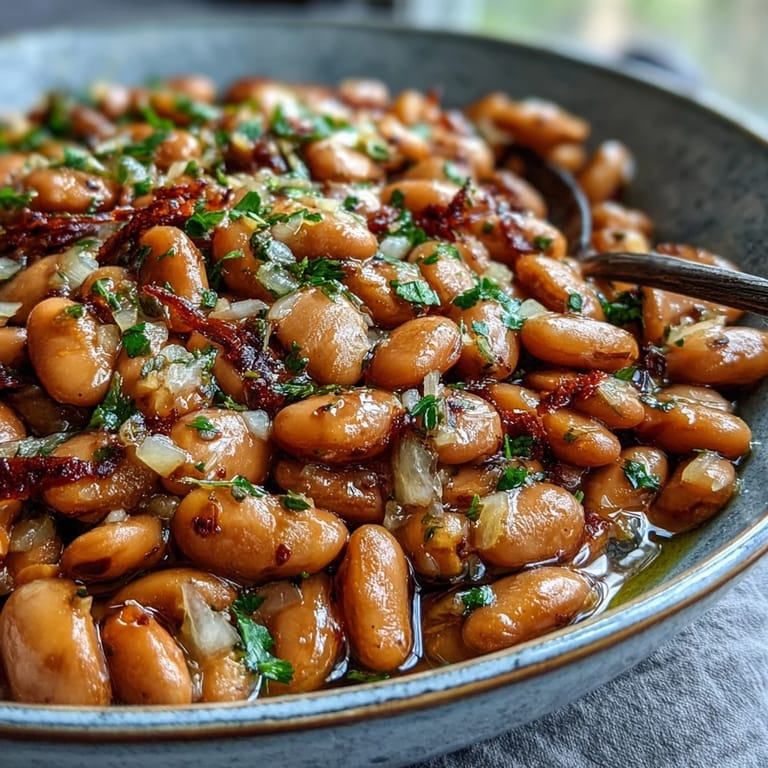
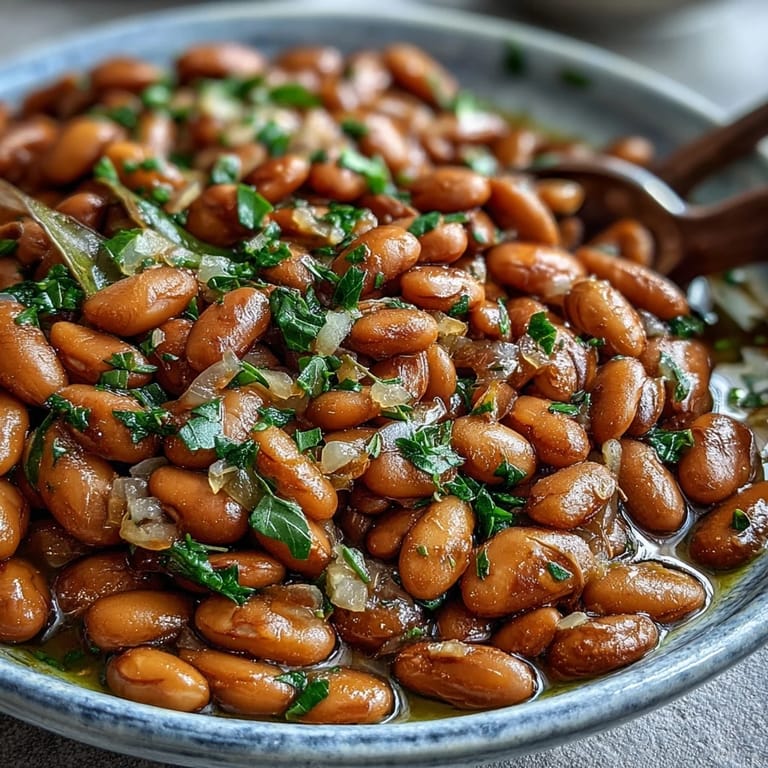
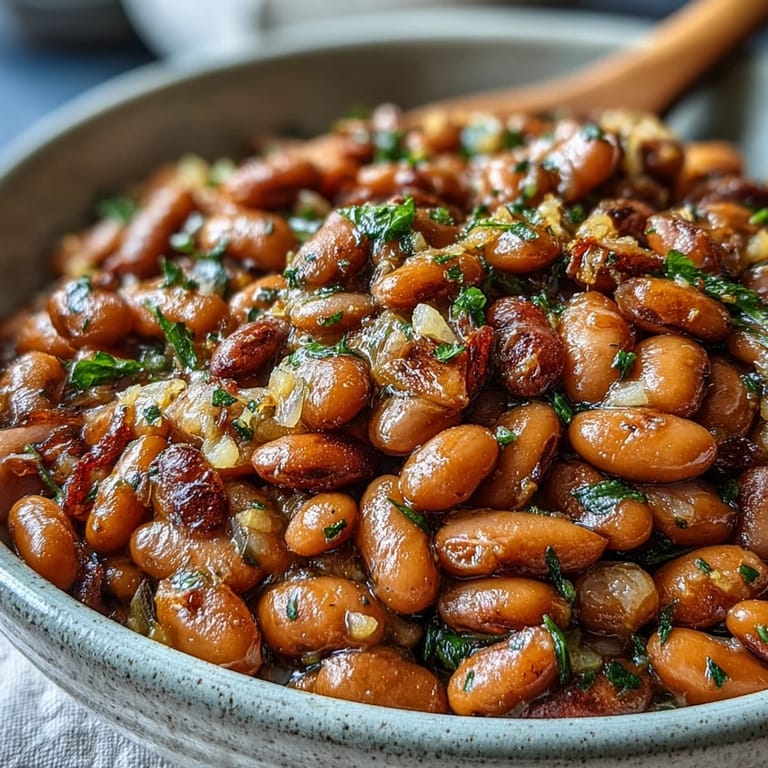
- Drain and rinse the soaked beans thoroughly, then transfer them to your Dutch oven along with fresh water, the onion, garlic, bay leaves, and that generous pour of olive oil.
- Bring to a boil:
- Crank the heat to medium-high and wait for bubbles to form, skimming off any foamy scum that rises to the surface—it's just protein, but removing it keeps the liquid clearer.
- Simmer gently:
- Drop the heat to medium-low, letting the beans bubble quietly for about 1½ to 2 hours, stirring occasionally and adding more water if they start peeking above the surface.
- Season at the end:
- During the last 10 minutes of cooking, stir in the salt and give it a taste—the beans should be tender but still holding their shape, not falling apart.
- Fish out the bay leaves:
- Discard them before serving, then scoop the beans into bowls, mash them for refritos, or let them cool and store them for later in the week.
 Pin It
 I learned the hard way that rushing this recipe never pays off. Once, trying to speed things along, I cranked the heat and ended up with beans that were scorched on the bottom and still raw on top. The whole pot went into the compost, and I ordered takeout. Now I think of that failed batch every time I resist the urge to rush the simmer.
Making Ahead
These beans actually taste better the next day, once they've had time to sit in their own cooking liquid. I often make a double batch on Sunday and keep them in the refrigerator, using them throughout the week for everything from breakfast burritos to quick chili bases. The flavors deepen and the beans continue to absorb the seasoned liquid.
Variations
While the classic version is hard to beat, sometimes I throw in a dried chipotle pepper or a piece of smoked bacon during the simmering. The smoke permeates every bean without overwhelming the pot. Vegetarians can add a piece of kombu seaweed for extra umami, or stir in a spoonful of miso paste at the end for depth.
Storage Tips
Cooled beans store beautifully in their cooking liquid, which keeps them from drying out in the refrigerator. Portion them into shallow containers rather than one large container—they'll cool faster and stay safer. When reheating, add a splash of water because they thicken up considerably as they sit.
- Freeze beans in 2-cup portions, which is roughly equivalent to one can
- Label your containers with the date, since frozen beans are best within three months
- Thaw overnight in the refrigerator rather than microwaving, which can create hot spots and uneven textures
 Pin It
 There's something deeply satisfying about transforming a bag of dried beans into a pot of creamy, flavorful sustenance. It's cooking that connects you to generations of home cooks who understood that the best things in life just need a little time and attention.
Recipe Questions & Answers
- → Do I really need to soak pinto beans overnight?
Overnight soaking dramatically improves texture and reduces cooking time. The beans hydrate evenly, resulting in creamier interiors and fewer split skins. If short on time, use the quick-soak method: boil for 2 minutes, then let stand 1 hour before cooking.
- → Why add salt at the end instead of the beginning?
Adding salt during the last 10 minutes prevents beans from becoming tough. Salt can interfere with water absorption during extended cooking, so seasoning near the end ensures tender results while still allowing flavor to penetrate.
- → Can I cook these in a slow cooker or Instant Pot?
Absolutely. For slow cookers, combine all ingredients and cook on low for 6-8 hours. In an Instant Pot, cook on high pressure for 25-30 minutes with natural release. Both methods yield tender, flavorful beans with minimal hands-on time.
- → What's the purpose of olive oil in the cooking liquid?
Olive oil prevents foaming during cooking and contributes luxurious mouthfeel. The fat emulsifies slightly with bean starches, creating a richer, creamier texture. It also carries aromatic flavors from the onion and garlic throughout the dish.
- → How do I know when pinto beans are fully cooked?
Perfectly cooked pinto beans should be tender enough to mash easily between fingers but still hold their shape. Taste test a few beans—they should be creamy throughout without any chalky or gritty texture in the center.
- → Can I freeze cooked pinto beans?
Cooked pinto beans freeze exceptionally well. Portion cooled beans into freezer-safe bags with some cooking liquid to prevent drying. They'll keep for 3 months and thaw quickly in the refrigerator or microwave for convenient meal additions.