Pin It
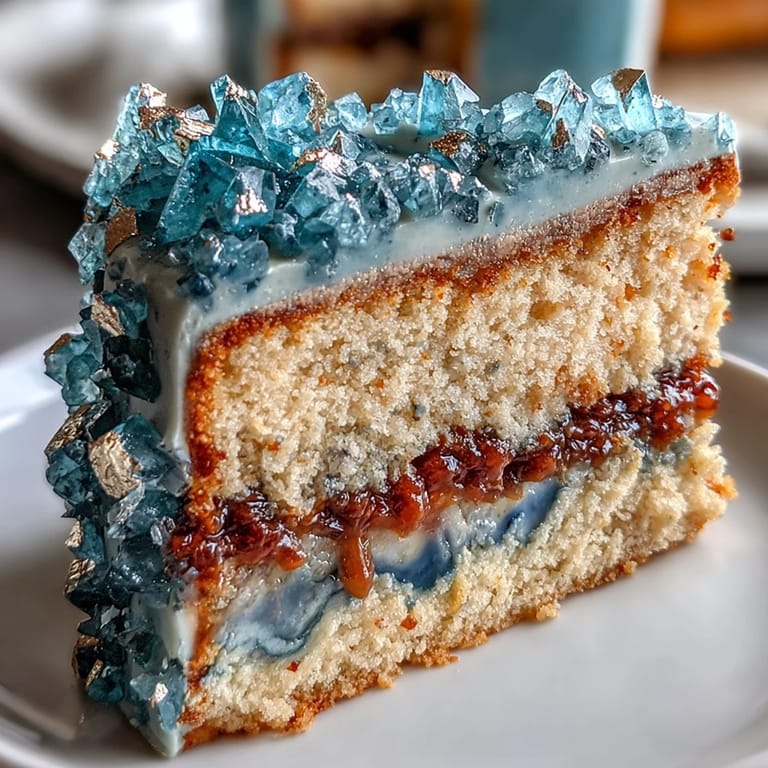
 The first time I set out to craft a graduation cake with a teal and gold geode design, the kitchen filled with a gentle hum of excitement from my playlist and the soft clinking of sugar crystals. There's a unique thrill when you pull out the gel food coloring and edible gold leaf—not your everyday baking supplies. I remember watching the buttercream transform into a bold teal, fingerprints smudged across mixing bowls, and a small swirl of flour drifting onto my shoe. This recipe emerged as an artistic way to celebrate achievements big and small, blending sweetness and shimmer. It always reminds me that dessert, especially for special occasions, should satisfy both the palate and the playful spirit.
As I decorated the cake for my cousin's graduation, laughter bounced between kitchen walls while my niece insisted we needed more glitter—and accidentally scattered sugar crystals across the counter. The last gold leaf touches always turn into a group event, everyone leaning in for a look and a debate on where the "best shimmer" should go. It became a cake not just for the graduate, but a memory stitched together with laughter and teal-stained fingers. I quickly learned to keep extra paper towels handy for the inevitable buttercream smudges. Even the most accidental moments ended up as part of the charm.
Ingredients
- All-purpose flour: The backbone of the cake, sift it beforehand for a lighter texture and no lumps.
- Baking powder: Gives the cake layers their lift—double check expiration dates for a good rise.
- Salt: Balances the sweetness; I found a tiny pinch makes the flavors pop.
- Unsalted butter: Soft at room temperature blends easily, resulting in extra fluffy buttercream and cake.
- Granulated sugar: Focus on creaming it until pale; this sets up light, tender cake layers.
- Eggs: At room temperature, eggs emulsify better—leave them out before starting.
- Vanilla extract: Use pure vanilla for depth; a splash more than the recipe adds warmth.
- Whole milk: The cake's richness depends on it—avoid skim for best results.
- Powdered sugar: Sift before mixing so the buttercream is silky smooth, never gritty.
- Heavy cream or milk: Adjust by spoonful for buttercream that spreads without tearing cake.
- Teal gel food coloring: This delivers a vivid jewel tone without thinning your icing.
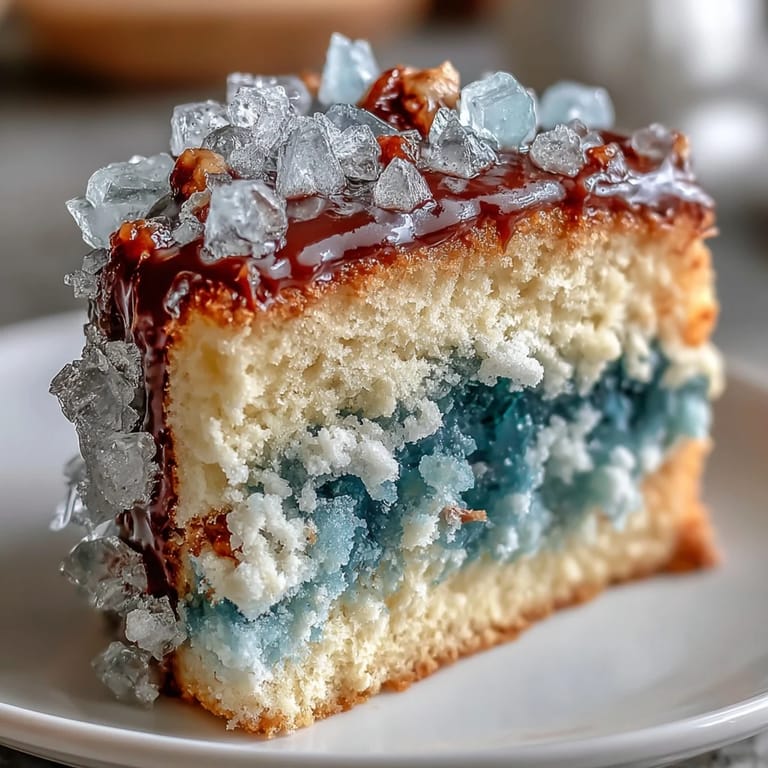
- Rock sugar crystals: Their chunky sparkle is what gives you that geode illusion, so choose clear or white.
- Edible gold leaf or luster dust: Paint delicately for best results; less is more for an elegant finish.
- Simple syrup (optional): Moistens layers and makes the cake last even after the party.
Tired of Takeout? 🥡
Get 10 meals you can make faster than delivery arrives. Seriously.
One email. No spam. Unsubscribe anytime.
Instructions
- Mix the Vanilla Cake Batter:
- Whisk together flour, baking powder, and salt—catch the floury puff and ensure every grain is blended. Cream butter with sugar until it almost glows, then beat in eggs and vanilla slowly so the mixture stays light.
- Bake the Cake Layers:
- Divide the batter between pans and slide them into the oven; the smell of vanilla building up is pure anticipation. Bake until golden and a toothpick comes out clean, then cool to room temperature before handling.
- Whip Up the Buttercream:
- Beat butter until whisper-soft, then slowly add powdered sugar and vanilla—it's all about patience here. Swirl in teal gel coloring and adjust with cream until the buttercream holds swoopy peaks.
- Color the Sugar Crystals:
- Toss rock sugar with a few drops of teal gel coloring—watch the transformation and let them air dry until ready. Spread them out to avoid clumps and uneven color.
- Assemble Cake Layers:
- Level the cakes, brush gently with syrup, and layer with creamy buttercream—make sure each tier sits snugly. Crumb coat and chill, then frost with teal buttercream for that deep, luxe shade.
- Carve and Create the Geode:
- Cut a dramatic wedge into the cake side and fill with buttercream, then press colored crystals for a stunning reveal. Paint gold edges with a steady hand, creating a slice worthy of celebration.
- Add Finishing Touches:
- Sprinkle gold accents and place a graduation topper for flair. Pause to admire—every shimmer and smudge tells its own story.
 Pin It
 When we served this cake at my sister's backyard graduation, people lingered long after dessert was gone, admiring the geode slice from every angle. It felt more like unveiling a piece of art than cutting a cake, and every bite sparked new compliments and curiosity. Seeing the cake in photos later made me smile—the gold shimmer really did glow at sunset, marking the milestone with a touch of magic.
Decorating Details That Matter
Working with rock sugar takes a little patience, especially when mixing coloring gently so crystals don't fracture. I found that layering colors—using both teal and a hint of blue—adds depth and a jewel-like vibrancy that really pops under party lights. Using an offset spatula, smoothing the buttercream feels almost meditative, and tiny ridges can actually make the gold accent look more organic. A graduation topper is the finishing touch; sometimes it sparks a grin or becomes a keepsake from the celebration.
What to Pair and Serve With This Cake
Chilled sparkling wine pairs beautifully, cutting through the richness of vanilla and buttercream while highlighting the festive vibe. If your crowd prefers something non-alcoholic, a floral lemonade or even iced tea with citrus works wonders. Keep the slices generous—it's surprisingly light and easy to eat, even after a big meal. Leftovers can be refrigerated and still taste great; the simple syrup keeps layers moist.
Assembly Troubleshooting and Quick Fixes
I once sliced the geode wedge a little too deep and had to patch it with extra buttercream—it blended seamlessly after pressing in more crystals. If a sugar crystal slips off or buttercream cracks, don't panic: a dab more frosting solves almost everything. Working with edible gold leaf can be fiddly, so use tweezers and steady hands, but remember that slight imperfections look handmade. Don't skip the chilling step between coats—it's the difference between smooth sides and a messy finish.
- Always prep tools and have parchment ready for easy cleanup.
- If coloring feels too intense, blend in uncolored sugar to lighten.
- Stop for photos before serving—the cake will vanish quickly after!
 Pin It
 Bake this cake with friends or family nearby—there's more joy in the process than perfection. Celebrate big milestones with a slice of sparkle and remember: every shimmer, crumb, and laugh adds to the story.
Recipe Questions & Answers
- → How do I achieve the geode look?
Use teal-colored sugar crystals and edible gold leaf to mimic the shimmering layers of a real geode, pressing crystals into buttercream inside a carved cake slice.
- → Can I change the cake flavor?
Yes, you can infuse lemon or almond extract for added flavor, or customize the vanilla base to suit your preference.
- → What food coloring should I use?
Gel food coloring is best for vibrant teal tones, and blending blues enhances the dramatic effect.
- → How many servings does this cake provide?
This cake yields up to 16 servings, ideal for group celebrations and gatherings.
- → Is this dessert suitable for vegetarians?
Yes, all primary ingredients are vegetarian-friendly, but always verify labels for sugar and food coloring brands.
- → What tools are recommended?
An electric mixer, offset spatula, cake pans, serrated knife, and food-safe paintbrush will help with preparation and decoration.